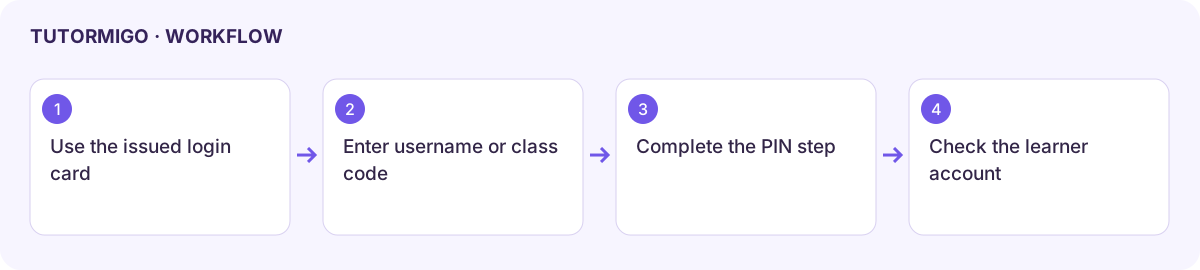
Use a student login card or class code
Managed student accounts can use a username and PIN or the class-login flow provided by their parent or teacher. Use the instructions and login card issued for your account; these differ from ordinary email sign-in.
Sign in with a student username
Section titled “Sign in with a student username”- Open Student Login and enter the username from your login card.
- Continue to the PIN step and enter your assigned PIN privately.
- Check the displayed account before starting a lesson, especially on a shared device.
- Sign out when finished. Do not leave a managed student session open for the next learner.
Repeated incorrect attempts can trigger a lockout countdown. Wait for it to finish instead of repeatedly submitting the same guess. Ask the parent or teacher managing the account for a reset if you cannot remember the PIN.
Sign in through a class
Section titled “Sign in through a class”Open Join Your Class. Enter the class code, load the roster, and select your own name card. Follow the class-PIN and student-PIN controls shown for that class. A class code identifies the class; it does not mean you should choose someone else’s card.
If the roster is empty, confirm the code with the teacher and check whether the invitation is still active. If your card is missing, the teacher must check enrollment. If sign-in is paused, the manager should inspect the account state or consent status.
Choose a workspace
Section titled “Choose a workspace”For an eligible independent account, the profile menu’s Switch Role opens Choose your role. Select Student, Teacher, or Parent and continue. This changes the workspace; it does not give access to another family’s children or another teacher’s class.
An age-up migration is a separate parent-managed flow. Use its displayed instructions and expiry rather than creating a second account without completing the handoff.
Workflow at a glance
Section titled “Workflow at a glance”